Showing posts with label Fun for the Kiddos. Show all posts

Monday, January 20, 2014

Pajama Eater Review

Hello fellow crafters! I've been MIA for a while but I was very busy with trying to make things for Christmas AND making things for our newest niece, Snow! She is a precious little gal!

Anyways, my review for the Pajama Eater pattern from Sew Fearless... three words... I LOVE IT! 

First, the directions are written in a comic book form and I thought that was neat! Second, it was very clear in the directions. Third, it had nice pictures! I don't know about you, but I really like the patterns with pictures... sometimes directions get hard to explain or even understand and nice pictures can make a huge difference! (yes, I am sometimes a "picture reader"... don't judge me! hahaha)

I made 7 of them for Christmas gifts for my kiddos, nieces and nephews. They get carried everywhere! Who knew little monsters could be so cute?!

Here are the Pajama Eaters I made for Christmas.


Would I buy the pattern again? Why yes, yes I would!
Head over to Sew Fearless and start making some little ones in your life a Pajama Eater! I'm sure they won't be disappointed in them!


Wednesday, December 26, 2012

How To Make Peppermint Bark

I LOVE Peppermint Bark and it's so easy to make yourself! You can make a lot more yourself than you can buy it too. Saving money.... umm... YES PLEASE!


You Will Need:
* White Chocolate
* Milk OR dark chocolate (whichever you prefer)
* Peppermint candy ( I used candy canes)
*Wax Paper
*Cookie Sheet Pan

Melt your chocolate either in a microwave safe bowl OR in a double boiler pot.
I don't have a specific amount. I just eyeballed it to what I thought I would want.

 POur your melted chocolate onto you wax paper lined cookie sheet pan and spread it to the thickness you want. It's usually about 1/4".
Sit it in the fridge for about 20 minutes.


Double bag your peppermints or candy canes in a Ziploc. Crush them with a rolling pin to the size you like.
 Separate your larger chunks from the peppermint "dust".

 Melt you white chocolate and mix in some of your peppermint "dust". 

Remove your hardened chocolate from the fridge and pour your white chocolate on top of it. Spread it around until the chocolate underneath is covered. This is also usually around 1/4" or so thick.

Sprinkle your larger peppermint chunks on top and sit it in the fridge for another 20 minutes.

After it's hardened, break it up into pieces and wala... you're done!


Friday, December 7, 2012

Salt Dough Christmas Ornaments

The other day I had a friend make some of these for her kids and I thought it was so cute! Of course I had to share how to do them! 

 You Will Need:
* 1 cup of flour
* 1 cup of salt
* 1/2 cup of water
 
 Here are some that we made!
My Sweet Ella's Ornament!
Yeah, that's yellow and pink but the picture looks orange. hmmm

My sweet Brenna's ornament!

My sweet Emma's ornament!


So, these cute little ornaments are really easy to do! Just knead the ingredients listed above in a bowl until it's about the consistency of play dough.


 Roll out your dough on a piece of wax paper. Make the dough around 1/4" thick.
Make your designs. Cookie cutters would come in really handy! Wouldn't you know I couldn't find any, so I used bowls to make a circle outline for ours.


Place your cut outs on a baking sheet lined with wax paper. 
Take a straw and make holes for the ribbon to be tied through.

Bake at 200° for about 2 hours or until hard.
The smallest one we made was done in about an hour but the larger ones took about two hours.

After they are all done and cooled off... Time for the fun part, PAINT!
I let the girls paint them however they wanted, let them dry, then went over their hand print with red paint so they could be seen.

Those other two are mine. Not the best but it was fun! I need to invest in some paint pens for projects like this!

My girls HAD to have glitter, so I had some of this spray glitter in my craft stash. 
After the paint dried, we sprayed the ornaments with glitter twice and then sealed them using the Mod Podge clear acrylic sealer.

Just for fun, here are the ones I done. Next time, I'm getting cookie cutters and paint pens! Hehe

Just in case you're wondering... yep, that special date is the day we were married!

Happy Memory Making!

Sunday, September 30, 2012

How To Make Goo


Who doesn't like GOO, right!? My niece and daughters loved making their own ooey, gooey, slimy, yucky GOO and it is so easy!


It's a great little project for rainy days or Halloween that is coming up fast!


You Will Need:
* Liquid Starch (You can find it around the fabric softeners)
* Glue ( Like Elmer's School Glue)
* Bowl
* Food Coloring
* Spoon (optional... we liked using our hands... hehe!)


Put 1/4 cup of liquid starch and 1/4 cup of glue into your bowl... add your color of choice of food coloring and mix with your spoon or your hands. Mix until it is a glob that holds together. The more you mix, the stronger it will be.

FYI... My daughter got some on her shirt that I didn't notice until laundry day and it came out no problem!


Have fun making GOO with the Kiddos!!!

Saturday, September 1, 2012

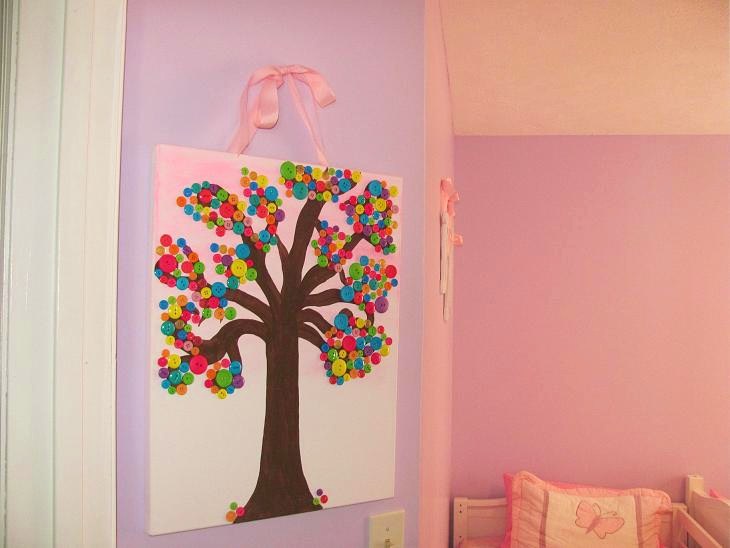
Button Tree Canvas Art


OK... I love the Button Tree! I did this cute little button tree for my girls' room. I wanted it bright and just cheerful for them. It reminds me of what a candy tree would look like... if their were candy trees!

This is also a fun project for kids. My girls liked getting to help place the buttons on!

You will Need:
* Canvas (any size)
* Paint
* Buttons
* Craft Glue
* Paint brushes
* Pencil

Paint your canvas in the shade you want. To get the faded look just start at the top and keep blending it in. You can paint the whole thing or not paint it at all. It's up to you.

Take a pencil and draw your tree. It doesn't have to be perfect. The buttons will cover up any mistakes you may make. Drawing is not a strong point of mine, so don't look to close to my tree.

Paint your tree

Play around with your buttons, find a place you like them and glue them down. If you would like to use any buttons that have the "hook" on the back, just take a craft knife or box cutter (something with a sharp point) and make a SMALL slit where you want it. Glue the back while sticking the "hook" thru the slit you made.

When gluing your buttons down, use a craft Glue like E6000 or Craft Art. I wouldn't hot glue them. The hot glue doesn't hold well to the canvas and pops off easily. If you do dots on the back of your buttons, use a very small amount (you don't need a lot). I like to take a small flat brush and brush the glue on.

You can add hardware to hang it or ribbon. I used ribbon since it was going in the girls' room.

Here are some pictures of it hanging in their room. It was kinda hard to get a good picture. Their room has an odd angle when you first walk in.


I hope you enjoyed the button tree! They are super fun to make and very easy! Their are so many things you can do with them too. You can make them bright and cheerful or a little more sophisticated.

Happy Crafting!

Friday, July 20, 2012

Glow Jars


I Love these Glow Jars aka Firefly Jars! Their are two ways to make these, one lasting a lot longer. Now you can use glow sticks (these Glow much brighter but don't last but about one day) OR you can use Glow in the dark paint (This lasts much longer b.c it charges in the light but doesn't glow as bright). It's all up to you.

You will Need:
* Jars with Lids
* Glow Sticks OR Glow in the dark paint
* Paintbrush if using glow in the dark paint

If you are using Glow Sticks:

Make sure your jars are clean and dry.

Break your glow stick so it will glow.

Cut the end off and shake the contents in the glow stick all around in your jar.

You need to be extra careful with the Glow Sticks as they do have glass in them.

That's it if your doing the glow sticks.


If you are using Glow In The Dark Paint

Make sure your jars are clean and dry.

Take the end of your brush and dot the paint onto the inside of the jars. The more you dot, the more they will glow.

I personally think these jars are awesome. I've made both and like both. I think these would also be really cute for an evening wedding reception for centerpieces or on the deck. What a conversation starter!


Wednesday, July 11, 2012

Kiddie Pool Cover

The other day my hubby said I needed to find or make the girls a pool cover b/c creepy crawlies kept getting in it. Well, I searched high and low and let me tell you... I couldn't find anything! I couldn't find one already made or even a tutorial on how to make one! So, here is how I made our Kiddie Pool Cover! It is so simple and the best part... it's WASHABLE!!! Yay!


You Will Need:
* 4 Yards of fabric
* 3 yards of 3/4 inch elastic

Our kiddie pool Measures 58" across, but you can use these same steps for any size. The bigger or smaller the pool, you may need to use more or less elastic and fabric though.

Take your 4 yards of fabric and cut it in half to were you have 2 pieces of 2 yards.
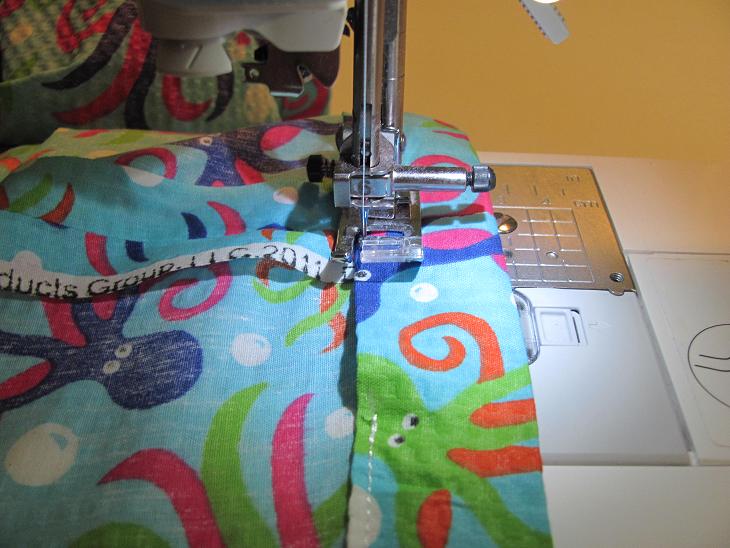
Unfold your fabric, right sides together (on one long section) sew a one inch seam and press it open.


Once sewn together, you will have one giant piece.


Now, I am one of those people who can not draw a good circle to save my life! But, I had an idea on how to make one this big.

Center your kiddie pool on top of your giant piece of fabric, wrong side of fabric facing up.


Take a ruler and measure 7" out from the side of the pool every so far with a water soluble pen. This will give you a guide to go by to cut the circle out.


Iron down a 1/2" seam around the entire circle.

Iron down a 1" seam around the entire circle and sew. Leave about a 3" opening for the casting for the elastic.


Put your elastic in your casting. The easiest way for me is to attach a safety pin to one end of the elastic and attach it to a section of the opening (so it won't get lost) and attach another safety pin to the other end and use it as a guide to slide your elastic through. Try to keep the elastic straight and not let it twist.

Once you get your elastic all in, sew your elastic ends together.

Sew your opening closed.


Wala! Now you have a cute cover for your kiddie pool to keep those pesky creepy crawlies out! I also made mine tight enough so no slithering snakes can get in. Cause with this heat, lets face it, our babies' pools are a hot spot for snakes! YIKES!