Thursday, September 5, 2013

Flower Garden Quilts

I found the cutest little flower garden pillow tutorial with FREE templates at Don't Look Now!

I've been trying to find a quilt pattern that I wanted to do for my girls and I fell so in love with this adorable template that I decided to do them a Flower Garden Quilt!


My girls LOVE their new quilts! Head on over to Don't Look Now!  and get your FREE flower garden templates!

If you need help with your quilt, check these out!

How To Free Motion Quilt
How To Back A Quilt
How To Bind A Quilt

Monday, July 22, 2013

Homeschooling

Our oldest daughter will be going to Kindergarten this year and after a lot of thinking, we have decided to home school her. Lots of emotions going on here! I'm really excited and I would be lying if I said I wasn't a little nervous too!

I have a  lot of support from my husband, family, friends and church family but I'm still so nervous! So, if you do any praying, pray that our homeschooling adventure goes well and that this mama makes it through! hahaha

My very sweet friend home-schooled her boys last year and she gave me some wonderful things to start us out on our Kindergarten journey.

Just look at all these goodies! I know... I have a great friend!
I still have a lot of things to get in order but this was a great little start and very much appreciated!
I always loved school, so I'm excited to show my girls all the wonderful things about learning!

If you homeschool, please feel free to share any tips!

How to make a pettiskirt

What little girl wouldn't want a pettiskirt!?


I made Ella a pettiskirt to go under her "minnie" dress for her birthday and she loved it!

I actually paid for a pettiskirt pattern and it was HORRIBLE! No pictures at all except for 1 of the finished project and the directions were not very good at all either. I didn't read much until I knew I had made a mistake buying it. (And I seriously hate giving bad reviews! Not fun!)

So, I used the tutorial from Make It & Love It. I made a few minor tweaks but for the most part, this was the best explained way to make a pettiskirt! Making a pettiskirt does take a bit of time but it's so rewarding seeing the finished project and the little cutie twirling and loving it! Just take your time and don't worry... YOU CAN DO IT!!! 


Our "Minnie" Turned ONE!

My baby has turned ONE! This is a very happy yet sad time for mama! She is the happiest baby and growing so well, but I'm so not ready for her to already be one! The year has flown by way too fast!

Never the less, I pushed through my "sad mama stage" and planned her big party! We had a few gliches but thank the good Lord, we made it through! 

Our party theme!?? We had to do Minnie of course! hehe

A very sweet girl from our church offered to dress up as a Minnie mouse. She looked so cute!
All the Minnie and Mickey ears were made by my sister, step-niece and I. I honestly don't know if I would have gotten everything done if it weren't for them! They were a HUGE help!

I made her dress and pettiskirt. The head gear was a gift.
This is my first pettiskirt and I'm very proud! I actually bought a pettiskirt pattern from a seller on etsy and I have never regretted buying a PDF pattern until that one! It was horrible and it was so confusing! No pictures and they tried to make it as hard as possible. But now I know... NO MORE patterns from that seller! Okay... my little rant is over! After searching online and seeing many ways that people do them, I found the best one, I thought, made a few minor changes but it was very helpful! Read about the pettiskirt here.
You can read my review on the dress pattern here.


Tiered popcorn stand! 


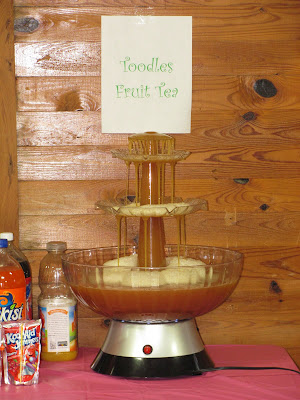
Hey, we are from the South... fruit tea was a Must Have!

Friday, June 7, 2013

Mackenzie Dress

I done a Minnie Mouse themed party for my youngest daughter's first birthday. :( Makes me kinda sad that my baby is already a year old!

I wanted to make her a dress similar to Minnie Mouses and I picked the Mackenzie dress from Fairytale Patterns. So glad I did! I LOVE how the dress turned out and it was super easy! I did make a pettiskirt to go underneath just to make it a little more frilly and fluffy though. This is a pattern that I would definitely recommend and I'll be using it again too!


Sunday, May 12, 2013

Burlap & Satin wedding aisle runner RUFFLES!! RUFFLES!! RUFFLES!!

I haven't posted in a while. Sorry! I was very busy with a special project for my cousin's wedding and now I'm doing Ella's first birthday stuff! (First birthday! NO way! Oh, my gosh!)

Anyways, I thought I would share some pictures of the burlap and satin aisle runner I done for the wedding. I LOVE how it turned out! It was VERY time consuming but the finished project was so worth it! Plus, my cousin loved it, which made me the happiest!


The runner was 30 yards long and about 120 yards of 6" wide satin!

Love the "N"? Me too! I found a GREAT site online for stencils! If you are ever in need of a stencil for any project, I highly recommend Wall to Wall Stencils! This is the second stencil I've done from them and it was super easy to do! 


She had a beautiful wedding! Very country chic!
The wind blew the ruffles over a bit but it was fixed before the wedding started! ;)

Sunday, March 24, 2013

How To Make a Fun Girly Headband

Easter is next week!!! Oh my goodness... it totally snuck up on me this year! 

Easter is one of my favorite holidays though! Plus, I love all the bright happy colors, the excitement the kiddos have for egg hunting and of course mama gets to make all her girls a new one of a kind dress!!!

This year I used the Olivia Pattern by Ruby Jean's Closet (the same one I done Christmas dresses in) and done a little tweaking. Nothing major. I LOVE this dress and it's so super easy and with every great little girl's outfit, their must be matching hair accessories!


You will need:
* A headband - you can buy either one out of the craft dept. and cover it yourself with ribbon or buy one done. I bought mine already done.
* Felt for the top (flower)
*Fabric
*Button
* Hot glue gun
* Felt for the bottom
* Template for your felt flower (you can find free templates all over the net)


Cut 1 felt flower using your template. and cut TWO circle out of felt. I used white felt and cut my circle about 2 1/2".
For the fabric, you will want to cut a strip of fabric that is 18" x 2 1/2". Serge all the edges. If you don't have a serger, just add seam allowance to all sides. Ruffle your fabric until it forms the circle you want.

Hot glue one of your felt circles to the ruffled fabric. This is the base.


Turn it over to the front and hot glue the felt flower and button on.

Mark on the headband where you want it and then hot glue it on.


Take your second felt circle and hot glue it to the underside of the headband, covering the first felt circle.

Easy Peasy and cute! You could also just stick a lined alligator clip on the back if you don't want the headband.

I'll add some pictures of the girls wearing theirs soon!

Sunday, March 17, 2013

How To Make a Custom Basket Liner

Making a basket liner is easy, fun and a great way to customize all your cute baskets for a fraction of the cost! 


See my great handmade soaps peeking out??? That is because I have the best SIL that makes some great smelling handmade soaps!!!

 Ok... so PLEASE forgive my inability to draw! Hopefully I can explain it better in words than what I draw!

Use 1/2" seam allowance.

First, you will need to measure the width (RED) by holding your measuring tape 2" on the outside of your basket... go down inside the basket, across the bottom, up the other side and 2" of the outside.
Mine was 19".

Now, measure you side (BLUE) by holding your measuring tape 2" on the outside of your basket and going down on the inside, stopping at the bottom. Remember, you will cut two of these.
Mine was 7".

Now on the outside, measure one long side and one short side to get your width for each.


My pieces measured 19"x9" and 7"x5".

Add 2" to all measurements for your cutting. My cut measurements were
21"x11" and 9"x7".

Sew your two smaller pieces onto your large piece.


Take you smaller pieces one at a time and pin the to the other end of your large piece. Sew. This will look like a bag with a whole in the bottom like above.


Time to sew your bottom up! One side at a time, pin and sew you edges together.


Fold and iron you top edge 1/4" and then fold and iron down a 1/2".

Sew around entire top except a few inches for the elastic.


To get the amount of elastic you need, you can just measure around your basket and subtract about 3-4".

Feed your elastic through the opening with your trusty safety pin.

Sew the ends of your elastic together.

Sew you opening shut. Add a little bow if you would like and Viola! A custom made basket liner!

I hope this didn't confuse anyone! This was kind of a toughy to explain. Maybe next time I do a toughy, I'll do a video instead. It would probably be easier.


Monday, March 11, 2013

How to bind a quilt


Binding a quilts is really easy... even if you're a beginner! It's really just basic measuring and sewing.

You can get creative with binding too! You can use one color or many colors (scrappy binding).

To know how much binding you need, you will need to measure all the way around your quilt and add about 10" or so. You'll also want to cut your binding about 2.5" wide.

Now to sew strips together...
Take two pieces, place them right sides together like this. Kinda like an upside down "L".

Sew across like shown. (Sorry, it keeps loading sideways)

Cut off extra fabric.

Open up and iron down your seams. Now you will have one continuous piece.

 Once you get your entire huge long strip for the entire quilt sewn together, iron it in half lengthwise.

You are going to line you raw edges up with the raw edge of the quilt. The red is what mine was laying on, so pay no attention to that. To start, you are going to unfold one of the ends and make a point by folding it over and then you will fold the ends back together.

Start sewing about 2" from where my fingers are in the picture above.

Stop about 1/2" from your corner and back stitch.

Fold over. Pin.

Fold your strip back where the raw edges meet up again. You will have a little flap now. This is what makes your mitered corners.

Make sure your flap is laying flat. You will start sewing at the top edge and work your way around the quilt doing all corners the same way.

Now, once you have worked your way back around to your starting point you will open up the pointed beginning we made. Remember? Tuck your binding tail right in there. Cut off any huge amount of excess you don't need and finish sewing it up.

Once that's done, flip your binding over to cover the other side and iron down.

Now, you can either whip stitch the back by hand stitching or you can sew in the ditch from the front of the quilt, making sure the get the binding on the back sewn on.


Happy Binding!