

For a tutorial on my wipe case click HERE
For a tutorial on my yo-yos shown on the wipe case click HERE
You Will Need:
* 1 1/2 yrd. of iron on vinyl
* 1 package of Extra Wide Double Fold Bias Tape
* 1 yrd. of fabric "A" (My fabric "A" is the owl fabric)
* 1 1/2 yrds. of fabric "B" ( My fabric "B" is the green fabric)
* 1/4 in. elastic
* 7/8 in. elastic
* 1 1/2 yrd. of iron on stiff interfacing
You will need to cut out for the outside:
* 2 Bag front and back 20"x13" (unless you want to front to be 2 fabrics like mine, then you will need the top piece to be 20"x5" and the bottom half be 20"x*")
* 2 Sides 7"x13"
* Bottom 20"x7"
* Cut 1 piece of iron on vinyl for each piece on the outside
You will Need to cut out for the inside:
* 2 Bag front and back for inside 20"x13"
* 2 sides 7"x13"
* Bottom 20"x7"
* Cut 1 piece of interfacing for each inside piece
Inside Pockets:
* 2 7"x6" pieces
* 2 3"x14" pieces
* 1 28"x6" piece
Straps:
* 2 pieces 4"x28" fabric "A"
* 2 pieces 4"x28" fabric "B"
* 2 pieces 4"x28" interfacing
* 4 pieces 4"x28" iron on vinyl
First we will be working on the Outside
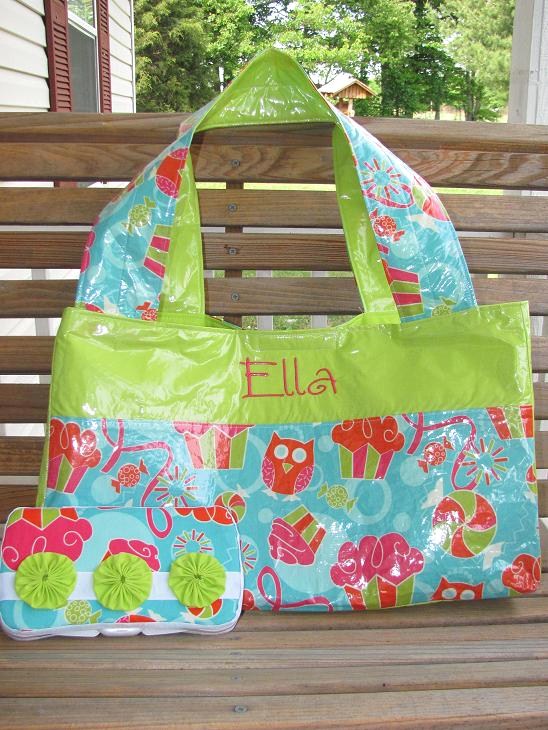
**If doing a monogram, go ahead and do it on your front piece where you want it
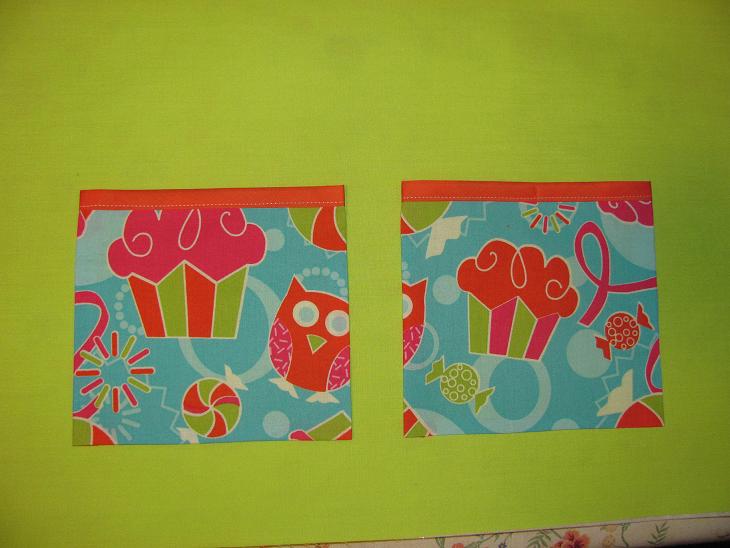
Here is my front.

With right sides together, sew a 3/8" seam allowance
This is what your back should look like now.

Flip to the front and sew along the entire piece

Now that your front is sewn together. Iron your vinyl to all the outside pieces following the instructions.

Now I will be using 1/2" seam allowance for the rest of the bag
With right sides (vinyl sides) together sew the front and bottom together.

Now with right sides (vinyl sides) together, sew the each side piece on.

This is what you should have after sewing on both sides

Now to sew on the backside!
Again with right sides (vinyl sides) together sew on your back piece by attaching it to the other side of your bottom piece.

Ok... this next part does require some maneuvering but is easy peasy!
Sew your sides onto your back piece. After sewing, you will have only the bottom piece open.... A bag is starting to form! Yay!!!

See how the bottom is still open?

Now to sew up that bottom to finish up the outside of our bag! Line up the side and bottom part that is open and sew them together.

Flip Your bag right side out and admire what a great job you done on the outside! This always gives me the extra little boost I need to finish it up! Haha!

Ready!? Now to the inside!
Iron on a piece of your interfacing to each of the pieces for the inside (front, back, sides and bottom)
Take your 2 7"x6" pieces and sew a strip of your bias tape to each top (7" side)

After you sew the bias tape to the top of each one, iron down the sides and bottom.
Place them on one of your 20"x13" pieces and sew then down. I just centered mine. (Remember to NOT sew the top part down or you won't have a pocket!)

Now take your 28"x6" piece and sew a piece of your bias tape to one of the long sides. (This is going to be your large inside pocket w/ elastic)

Cut 1 piece of your 1/4" elastic 20" long.
Take a safety pin and stick it through one end of your elastic and hook it on your fabric. (This will make sure the end won't slip in and get lost.)
Stick another safety pin through the other side of your elastic (This will help you easily slide your elastic piece through the casting.) Try to not let the elastic get twisted.

Once you reach the other side, sew down your elastic piece so it will stay in place. (Do this for both sides)
You will have this so far.

Line up the bottom of the piece you just done with the other 20"x13" piece and pin in down.

You will notice their is loose fabric for your pocket now. Just make a few (however many you want) of pleats to get the fabric flush.


Now take your 3"x14" piece, fold it in half right sides together and sew a 1/4" seam allowance to make a tube. (Do this for both pieces)

Turn your tubes right sides out by sticking a safety pin in one end and gliding it through to the other side.


Now iron down both of your tubes centering the seam on the back.

Now take a 7" long piece of your 7/8" elastic and slide it through the tube. (Do this for both tubes)
Once your elastic gets sewn down... attach one to each of your 7"x13" side pieces.

Now, assemble all your inside pieces just as you did for the outside pieces. Only this time on one of the sides, leave a 6" opening.

Take your 4 pieces for your straps and iron on a piece of interfacing to the back of fabric "B" and iron on 1 piece of the iron on vinyl to all four pieces (right side)

Take a piece of your fabric "A" and your fabric "B" and stitch a 1/2" seam allowance with right sides together.

Turn your piece to right sides out and finger press a 1/2" seam allowance on the open side and sew both sides and the center down. (Do this for both straps)


Now put the OUTSIDE part of your bag on the INSIDE part and pin the top edge together. Also go ahead and pin your straps on. The strap raw edges will meet the bag's top raw edge.


Sew a 1" seam allowance around the top edge.
Now, go to that 6" opening you left and pull the bag right side out. This may seem impossible, but with time and patience you can do it. The vinyl does make it a little harder to "slide" out but just take your time. I promise it will fit through.

Once you have concord turning it right side out, sew about a 1/4" seam around the entire top part of the bag.

The last part is all up to you. You can have no closure, do a sew on velcro, snaps... ect
Now take a look at how great you done on your new bag and be very proud! After all, it's quiet a job!

No comments:
Post a Comment